If you have some experience with virtualization you will see that this is the best option to create different testing environments, try new software or just use different applications in the same computer (like mixing windows and linux).
Installation on VMware is simple enough, the problem are those little “gotcha” that can ruin your mood.
So lets start, you have to get your copy of Windows 8 (don’t forget to get the key (DNJXJ-7XBW8-2378T-X22TX-BKG7J)
In order to create the virtual machine you select the File –> New Virtual Machine.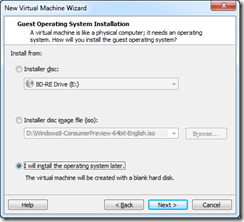
You have to select to install the operating system later, if you don’t do that VMware will try to create the unattended install file (which works for Windows 7).
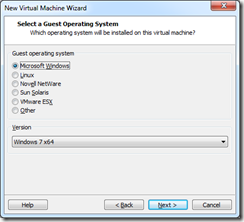
You can select any operating system, but in this scenario we select Windows 7 x64 to simplify the selection of drivers and devices.
You name your Virtual machine, and specify the location (I’m skipping that picture)
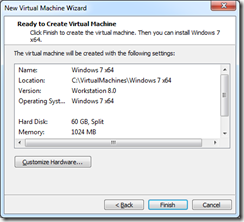
After that you specify the hard drive settings, I usually select a single drive, since its better performing.
Once you get to the Hardware screen:
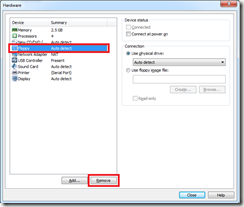
Click on the Customize Hardware, here is the main caveat, you have to remove the floppy disk from the available selection
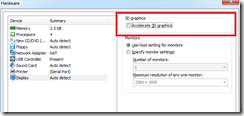
That will prevent Windows from Crashing, at least that did it for me, I also (as an extra precaution I disabled the 3d Graphics on the display configuration.
Once that is done, save your virtual machine, and change the ISO on the DVD to the newly downloaded copy of windows 8, after that it will boot, you have to do somewhere around 4 clicks and the installation will be completed.
There is not a lot to configure or change, once the installation goes, select the hard drive, and let it rip, you will be up and running in no time.
I have a couple more post you can check on some other details about the installation and configuration, and later on the week I will be adding more info on how it works.
I will be enabling the 3d acceleration on VMware, we’ll see if we crash or if it works as expected
Next step is to install Visual Studio 11 and start throwing lines! 😀
Get set, ready, Code!!
